Tuesday, September 4, 2012

Seafoam Peacock Cupcakces

 Had to share my birthday cupcakes!   Being able to go all out and buy fun decorating stuff is a big part of my present to myself.  I am a little obsessed with peacocks so they tend to translate into my decorating quite often.  Decorating for yourself is also a good way to learn some new techniques because you aren't as nervous about making mistakes.  These birdies are made with pressed sugar cookies, peeps, luster dust, custom colored dragees and lots of love. 

Friday, August 10, 2012

MARGARITA BARS

Margarita Bars
  Crust:
  • 1 1/4 cups all purpose flour
  • 1 cup animal cracker crumbs
  • 3/4 cup unsalted butter, room temp
  • 1/2 cup confectioners' sugar
  • 1 tsp Triple Sec
  • 1 tsp margarita salt

 Filling: 

  • 2 cups sugar
  • 1/4 cup lime juice plus zest of one lime
  • 4 large eggs
  • 3 tbsp Anejo tequila
  • 2 tbsp Triple Sec
  • 1/2 cup all purpose flour 
    Supplies
Cookie crust before baking.
Preheat oven to 350F degrees.  Combine all of the crust ingredients in a food processor and pulse the mixture to form a soft dough. Press the dough into an ungreased 13x9x2 inch baking pan and bake until lightly browned, about 20 to 25 minutes.  (*Variation-do not add the salt in the food processor, sprinkle on top of crust instead for a more powerful pop of flavor!) 
Makes me thirsty!

 While the crust is baking, beat together all of the filing ingredients. 

Golden crust.
 When crust is golden pour the filling  over the hot crust and return the pan to the oven.  Bake until set, 20-25 minutes.  Cool on a wire rack and then cut into bars.


Saturday, July 21, 2012

Whole Wheat M&M Brownies

    Ultra Rich & Gooey!!!


  • 1 cup unsweetened cocoa powder
  • 11 tbsp unsalted butter 
  • 1/4 cup sugar
  • 1/4 tsp salt
  • 1 tsp vanilla
  •  eggs
  • 1/3 cup plus 1 tbsp whole wheat flour
  • 1/2 cup M&M candies
What to do:
      Line the bottom and sides of an 8-inch square pan with parchment paper or you can butter the bottom and sides of a ceramic dish . Preheat oven to 325 degrees.
      Set a medium saucepan on medium-low heat. Add butter, sugar, cocoa powder, and salt. Whisk until butter is melted and the mixture is hot. Remove from heat and allow to cool briefly until the mixture is warm, but not hot.

      Stir in vanilla. Add the eggs, one at a time, mixing vigorously with a spatula after each one.  (*Tip-Break eggs separately in a clear glass bowl so you can catch shell before it gets in your food!)


 When the mixture looks thick, shiny, and well blended, add all the flour at once and stir until you cannot see flour any longer. Gently mix in 2/3 of your M&M's with a spatula.


Spread batter evenly in the lined pan.  Sprinkle remaining candies on top. Bake 20 to 25 minutes until a toothpick plunged into the center emerges with a very thin film of batter. Cool on a wire rack. Lift the edges the parchment or foil liner and transfer brownies to a cutting board. Cut into 16 or 25 squares. Brownies can be stored, airtight, for 2-3 days.


Custom flora and fauna hair clips.

       These are definitely one of my favorite things.  They are easy to customize for any season and make you feel pretty when you do not have time to really do anything with your hair buy put it in a bun and go. 

  • All you need is silk flowers/leaves, mushroom finches, butterflies or anything lightweight and beautiful for the decoration. 
  • Hair clips of your choice.  I love these straight duckbill clips they offer a great base.  You also do not need to look for a clip that will hold your hair.  The clip is only there to hold the design you want on your hair. 

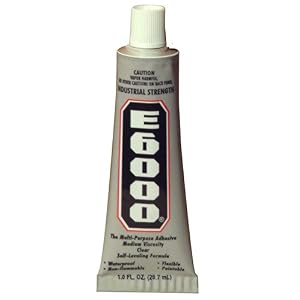
  •  E6000 glue.  It is magic what this stuff can do.  You will end up using this all over the house. 
The clips are really as easy as finding a flat part on your design.  Play with the ornament on a flat surface like a table to see how it naturally rests undisturbed.  Lay a piece of cardboard on your work surface and place a clip on your board.  Now rearrange the ornament on the clip to see how it rests.  If you try to force the positioning they will prematurely come off of the clip and you will get frustrated.  Now simply place a drop of glue onto the flat part of your clip and place the ornament.  Allow to dry for 4 hours.